Classes 10–12 (E): OpenAI API key, with a $5 limit
Part of the task-app setup for Classes 10–12. Work through the parts in order, doing every step yourself; Start here has the worksheet, the screenshot log, how to ask Claude when you’re stuck, and the list of all parts.
Time: about 10–15 minutes.
As of Oct 22, 2026 · Official docs: OpenAI API · Supabase: Edge Function secrets
The app sends each new task’s title and description to OpenAI, together with the labels you already use (at first: work, personal, priority, shopping and home), and gets back a label: one of those, or a new one when none fits. It uses a small, cheap model (gpt-4o-mini): one label costs a tiny fraction of a cent, so $5 lasts far longer than this course. The steps below make sure you can’t spend more than that.
Sign up at platform.openai.com (this is the API platform; a ChatGPT subscription does not include API use). Creating your first API key requires a phone number that can receive a text message.
Buy $5 of credit. Open the settings: click your organization’s name (Personal, at the bottom left) and choose Organization settings. In the settings menu on the left, click Billing. (The main menu also has a Settings item, below Plugins; on a small screen you have to scroll the menu, or zoom out, to see it.) The Billing page shows Pay as you go, your API credit balance ($0.00 for a new account), and whether Auto-reload is on or off.
Click Buy credits (on a brand-new account the button may say Add payment details). A window Add to credit balance opens:
- Amount to add starts at 10. Change it to
5; the line below says you can enter between $5 and $495. - Payment method: your card. On a new account, click + Add payment method and enter it.
- Click Continue.
The next window, Confirm payment, shows the credit ($5.00), an Estimated tax, which depends on where you live (44 cents in the screenshot), and the Estimated total. Read the small print: “Paid credits are non-refundable and expire one year from purchase date”. Then click Confirm payment.
Afterwards, check that the Billing page says Auto-reload is OFF: “When your credit balance reaches $0, your API requests will stop working.” That’s what you want: OpenAI never charges your card again on its own. Don’t click Enable auto-reload or Cancel plan. (If a window ever offers to turn on auto-reload while you buy, leave it off.)
Screenshots: buying credit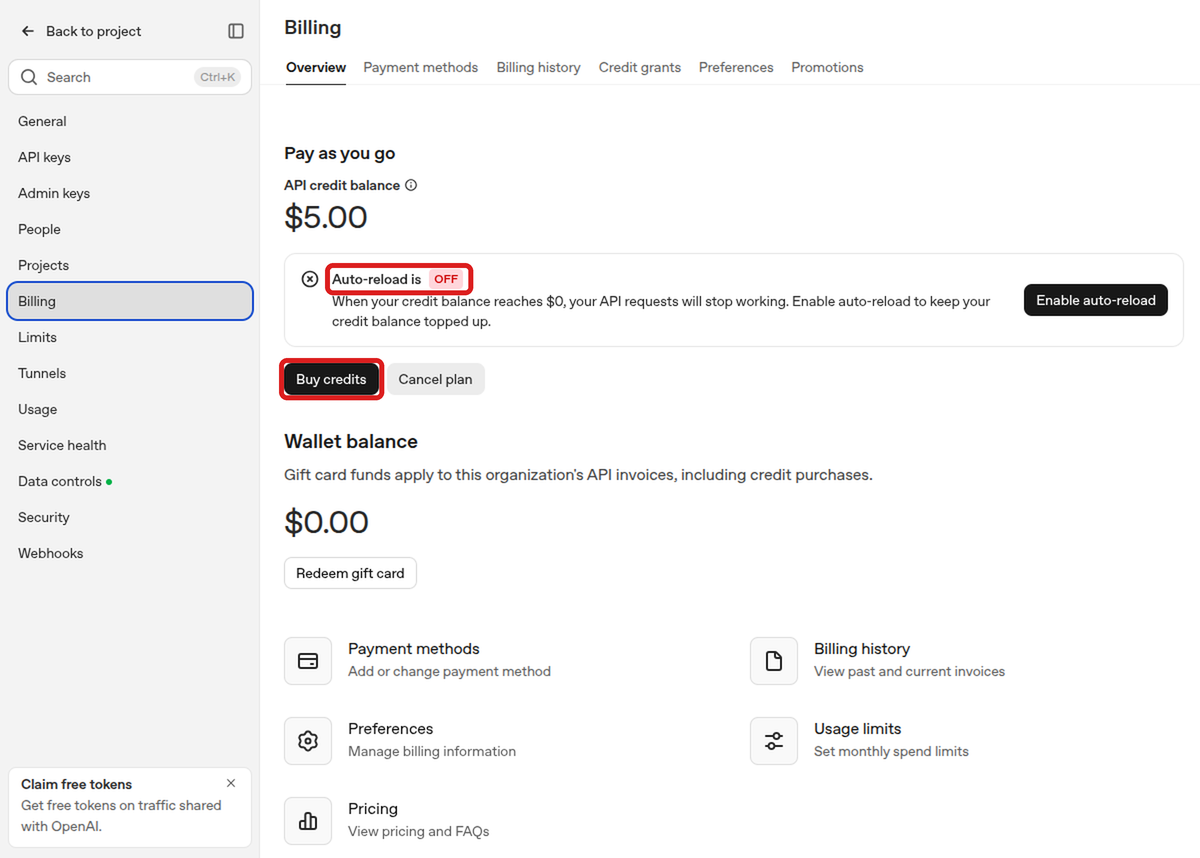
Organization settings > Billing: $5.00 of credit, and Auto-reload OFF 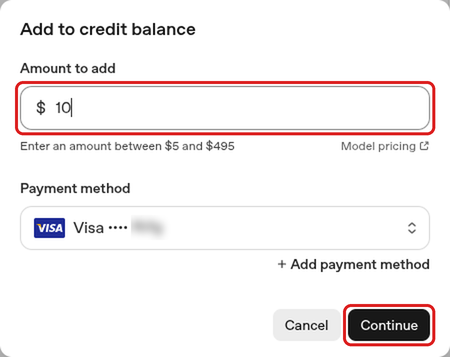
Add to credit balance: the amount starts at $10; change it to 5. The card’s last digits are blurred. 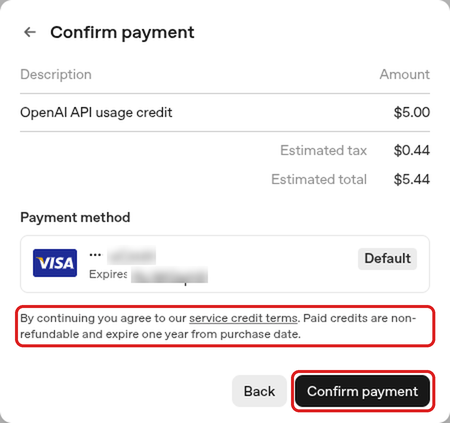
Confirm payment: $5.00 plus estimated tax. The card’s digits and expiry are blurred. - Amount to add starts at 10. Change it to
Create a project. Click Home in the left menu. Open the project menu at the top left (it shows the current project’s name and ⌃; a new account has only Default project), click + Create project, type the same name as your Supabase project (for example
task-app-2026-maria), and click Create. Then open the project menu again and choose your new project. The top-left button should now show its name, and Home shows Get started with Add credits ticked. To fix a typo in the name later: Settings > General > Project name.If the page goes blank when you switch projectsIn October 2026 the OpenAI website had a bug: switching projects while a Settings page was open showed a blank page, and reloading went back to the old project. (The page’s address names the old project, so the new one can’t load it.) Go to Home first, then switch. OpenAI may have fixed this by the time you read it.
Screenshots: creating the project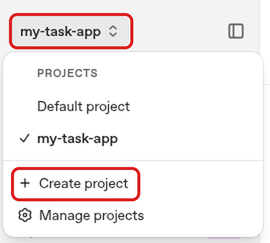
The project menu (an older project is also listed here) 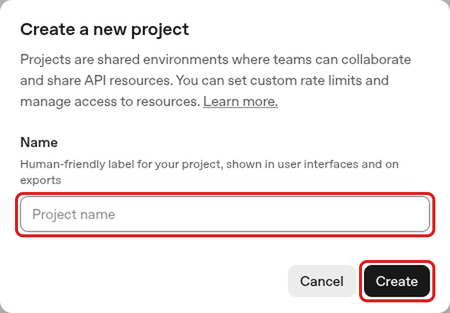
Create a new project 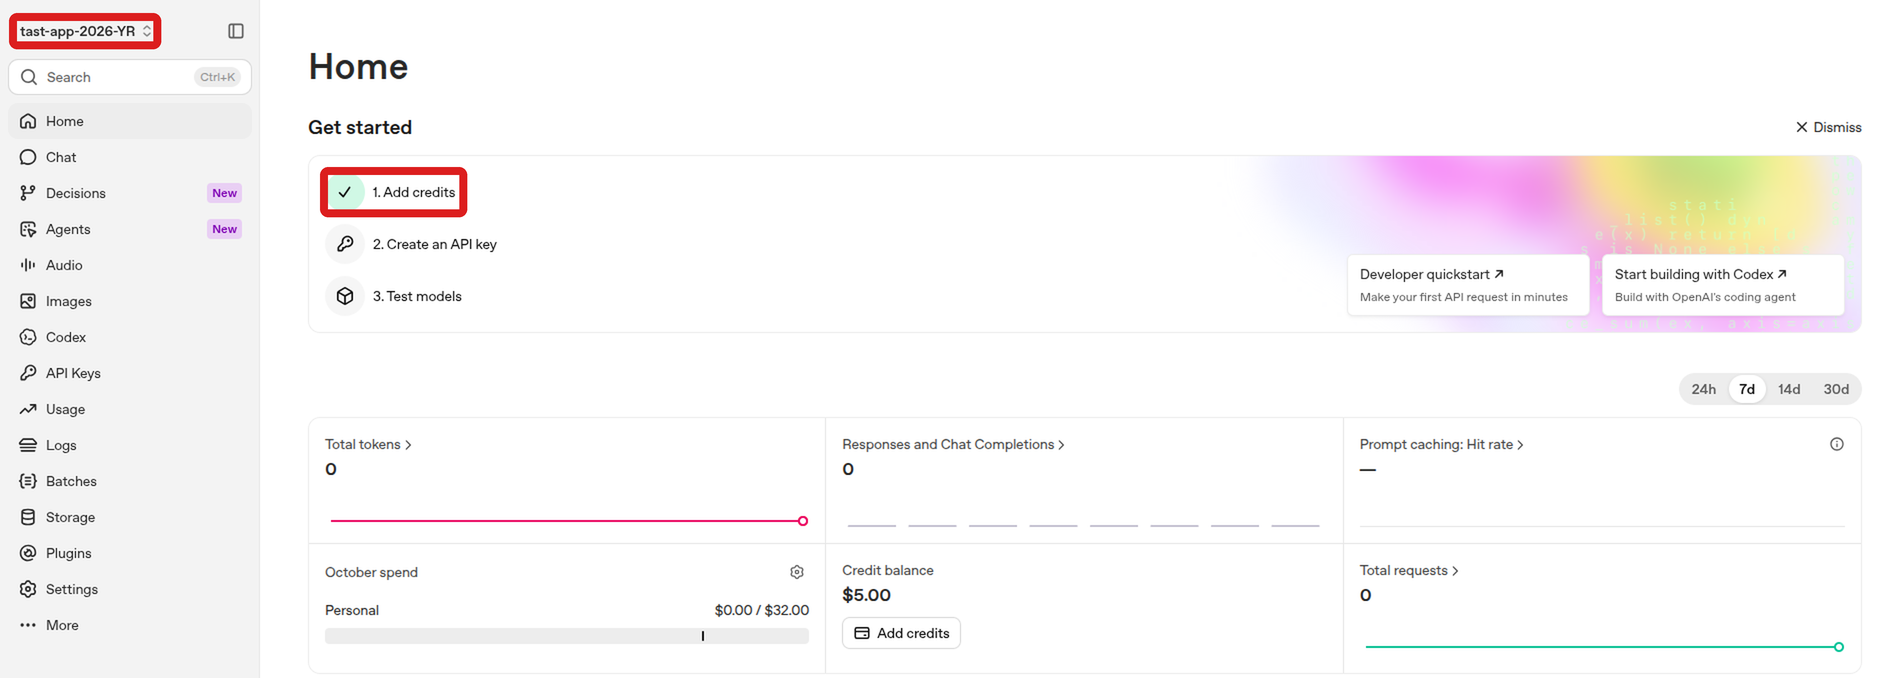
Home of the new project. (The name at the top left has a typo, “tast”; it was fixed later under Settings > General > Project name.) Set a hard spend limit. In the left menu, click Settings, then the Limits tab (make sure the top-left button shows your new project). Under Spend it says “No spend limit set”. Click Set spend limit:
- Monthly spend limit: type
5. (The grey100in the box is only an example; it isn’t filled in.) - Turn on Enforce a hard limit. It starts off, and without it the limit only sends you an email. When you turn it on, a red box explains what it does: once the project reaches the limit, new requests “will begin failing with a 429 error”, and because enforcement isn’t instantaneous, you may go over by a small amount.
- Click Set spend limit.
The Limits tab now shows Project spend limit with a green Limit enforced badge, $0.00 / $5.00, and under Spend alerts an email alert at 100% ($5), which OpenAI added for you. If the badge says Limit not enforced (red), click Edit spend limit, turn on Enforce a hard limit, and click Save.
Screenshots: the spend limit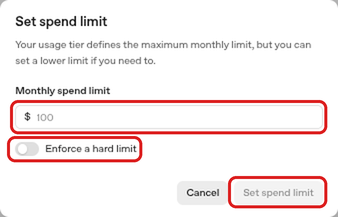
Set spend limit, before filling it in 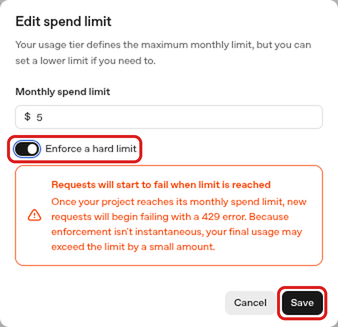
With Enforce a hard limit turned on, a red box explains what it does. (This picture shows the same window opened with Edit spend limit, so it says Edit spend limit and Save; the first time it says Set spend limit.) 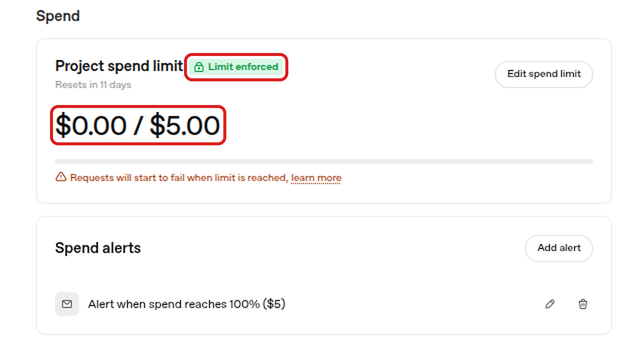
The result: Limit enforced, $0.00 / $5.00 - Monthly spend limit: type
Create an API key. Check that the top-left button shows your new project, click API Keys in the left menu, then Create new secret key. Fill in the form:
- Owned by: You.
- Name: what the key is for, for example
task-app-2026-maria edge functions. If a key ever leaks, the name tells you which one to delete. - Project: your new project (not Default project).
- Expiration: choose Custom and enter the number of days from today until a little after the end of the semester. (The instructor entered 100 in late October.) Count from the day you do this step. A key that expires stops working by itself, so a forgotten key can’t be misused later. The other choices are 1 day, 7 days, 30 days and Never.
- Permissions: All.
Click Create secret key. A window Save your key shows the key (it starts with
sk-proj-) and says “you won’t be able to view it again”. First take a screenshot of it for your screenshot log, then click Copy and paste the key into the worksheet. Then click Done. The list now shows your key with its name, Active, its expiry date, and only the start and end of the key (sk-...and four characters). If you lose the key, you can’t get it back: delete it (the trash icon) and create a new one.Screenshots: the form, and the key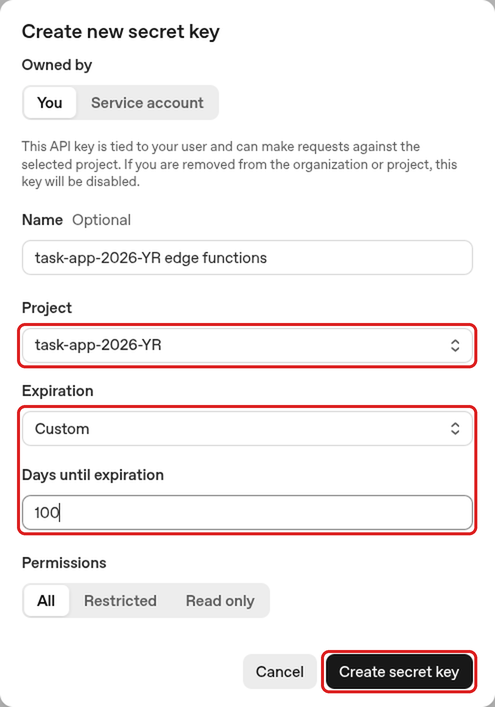
Create new secret key, filled in 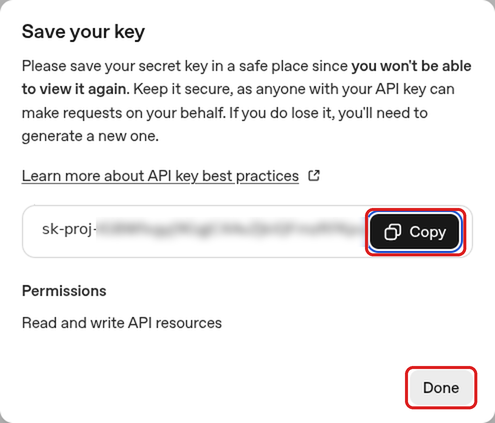
Save your key: shown only once. In this picture the key is blurred. Give the key to your Edge Functions yourself, so the key never goes into Claude’s chat. In VS Code’s terminal, first go into the app’s folder. It’s harmless if you’re already there; this just makes sure:
cd ~/projects/full-stack-demo-app/task-appThen copy the
npx supabase secrets set OPENAI_API_KEY=...line from the worksheet’s Commands sheet, paste it into the terminal, and pressEnter. It should printFinished supabase secrets set.What the pieces mean:
npx supabaseruns the Supabase CLI, as in Step C.secrets setstores a secret, a named value that your Edge Functions can read on Supabase’s servers but that never appears in your code or on GitHub.OPENAI_API_KEY=sk-proj-...is the secret’s name, then=, then its value: your key. There are no spaces around the=. The function’s code reads the key by this name.
More background in Step 7: Set Up OpenAI API (skip its instructions for Supabase secrets; use the worksheet line).